※1、 初始化系统设置
sed -i 's/enforcing/disabled/' /etc/selinux/config  # 永久

setenforce 0  # 临时

yum install ntpdate -y && ntpdate -u time.windows.com  && clock -w

systemctl stop firewalld  &&  systemctl disable  firewalld
※2、 安装依赖
yum -y install epel-release snmpd net-snmp-devel net-snmp net-tools sysstat

yum -y install gcc gcc-c++ unixODBC-devel mysql-devel libcurl libcurl-devel libevent libevent-devel fping curl-devel libxml2  libxml2-devel

yum -y install java-1.8.0-openjdk-devel  wget ftp iptraf libaio numactl pcre pcre-devel zlib zlib-devel wget perl perl-devel
※3、 安装并配置nginx
cd /usr/local/src

wget http://tengine.taobao.org/download/tengine-2.2.0.tar.gz

wget https://www.openssl.org/source/openssl-1.0.2p.tar.gz

tar zxvf openssl-1.0.2p.tar.gz  &&  tar zxvf tengine-2.2.0.tar.gz && cd tengine-2.2.0

groupadd www &&  useradd -g www www -s /sbin/nologin

./configure --user=www --group=www --prefix=/usr/local/nginx --with-http_stub_status_module --with-http_ssl_module --with-http_gzip_static_module --with-ipv6 --with-http_v2_module --with-openssl=/usr/local/src/openssl-1.0.2p/

make && make install

mkdir -p /www/web/zabbix_front

#上传nignx配置文件并覆盖

unzip -O gbk  nginx配置文件.zip

cd nginx配置文件

cp nginx.conf  /usr/local/nginx/conf/  && mv vhost/ /usr/local/nginx/conf/

ln -s /usr/local/nginx/sbin/nginx  /usr/sbin/nginx

#修改替换的配置文件域名
vim /usr/local/nginx/conf/vhost/a.conf

#添加host文件

echo  "机器公网IP test.zabbix.com" >>/etc/hosts

/usr/local/nginx/sbin/nginx

cd ~
※4、 安装mysql
wget https://cdn.mysql.com//Downloads/MySQL-5.7/mysql-5.7.35-linux-glibc2.12-x86_64.tar.gz

groupadd mysql  &&  useradd -g  mysql  mysql -M -s /sbin/nologin && tar zxvf mysql-5.7.35-linux-glibc2.12-x86_64.tar.gz

mv mysql-5.7.35-linux-glibc2.12-x86_64 /usr/local/mysql &&  chown mysql:mysql -R  /usr/local/mysql/

mkdir -p /var/lib/mysql  &&  chown mysql:mysql -R /var/lib/mysql

cat >/etc/my.cnf  <<EOF

[mysqld]

character_set_server=utf8

init_connect='SET NAMES utf8'

basedir=/usr/local/mysql

datadir=/usr/local/mysql/data

socket=/tmp/mysql.sock

max_connections=1000

default-time_zone = '+8:00'

bind-address=127.0.0.1

sql_mode="STRICT_TRANS_TABLES,NO_ZERO_IN_DATE,NO_ZERO_DATE,ERROR_FOR_DIVISION_BY_ZERO,NO_AUTO_CREATE_USER,NO_ENGINE_SUBSTITUTION"
skip-external-locking
key_buffer_size = 128M
max_allowed_packet = 1M
table_open_cache = 512
sort_buffer_size = 2M
net_buffer_length = 8K
read_buffer_size = 2M
read_rnd_buffer_size = 512K
myisam_sort_buffer_size = 32M
thread_cache_size = 64
query_cache_size = 64M
tmp_table_size = 64M
max_connections=1000
#skip-grant-tables
slow_query_log = ON
slow_query_log_file = /usr/local/mysql/var/slow.log
long_query_time = 3

#skip-networking
max_connections = 500
max_connect_errors = 100
open_files_limit = 65535

log-bin=mysql-bin
binlog_format=mixed
server-id       = 1
expire_logs_days = 10

default_storage_engine = InnoDB
innodb_file_per_table = 1
#innodb_data_home_dir = /usr/local/mysql/var
#innodb_data_file_path = ibdata1:10M:autoextend
#innodb_log_group_home_dir = /usr/local/mysql/var
innodb_buffer_pool_size = 1024M
innodb_log_file_size = 128M
innodb_log_buffer_size = 8M
innodb_flush_log_at_trx_commit = 2
innodb_lock_wait_timeout = 50
[client]

socket=/tmp/mysql.sock

EOF
※5、初始化mysql
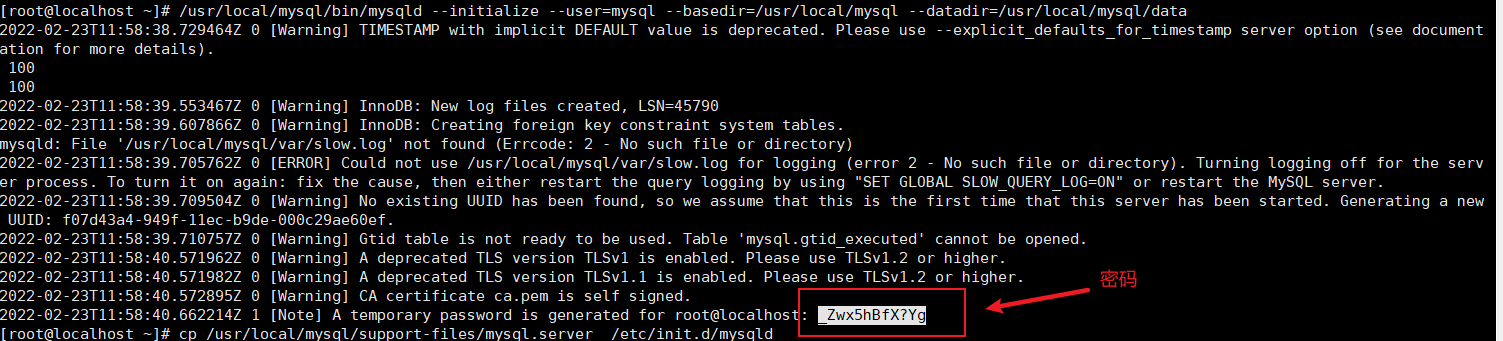
/usr/local/mysql/bin/mysqld --initialize --user=mysql --basedir=/usr/local/mysql --datadir=/usr/local/mysql/data

密码:_Zwx5hBfX?Yg  #下图示例,根据上边安装完提示的passwd获取密码

cp /usr/local/mysql/support-files/mysql.server  /etc/init.d/mysqld


复制初始化密码:_Zwx5hBfX?Yg

/etc/init.d/mysqld restart

ln -s /usr/local/mysql/bin/mysql /usr/sbin/  &&  ln -s /usr/local/mysql/bin/mysqldump /usr/sbin/

chkconfig --add mysqld

#自行修改密码

mysql -u root -p"_Zwx5hBfX?Yg"

ALTER USER USER() IDENTIFIED BY 'ddmddm12345';

flush privileges;

quit

#验证

mysql -u root -p"ddmddm12345"

exit

cd ~
※6、 安装php
rpm -ivh http://mirrors.wlnmp.com/centos/wlnmp-release-centos.noarch.rpm
yum install wphp74 -y
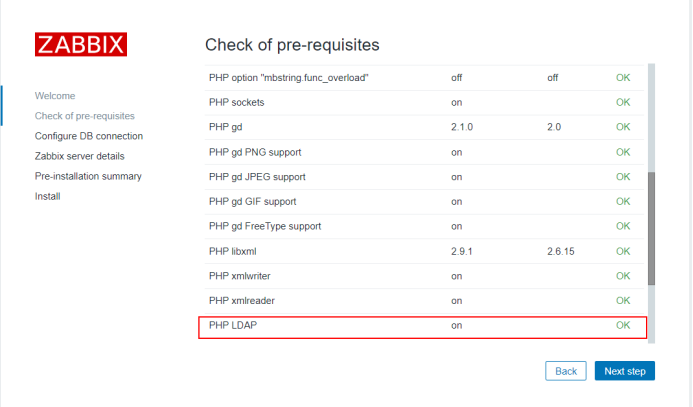
#安装php扩展LDAP
wget https://www.php.net/distributions/php-7.4.21.tar.gz
tar zxvf php-7.4.21.tar.gz && cd php-7.4.21/ext/ldap
yum -y install autoconf openldap openldap-devel
cp -frp /usr/lib64/libldap* /usr/lib/
/usr/local/php/bin/phpize
./configure --with-php-config=/usr/local/php/bin/php-config --with-ldap
make && make install
echo "extension=ldap.so" >> /usr/local/php/etc/php.ini
sed -i 's/max_input_time = 60/max_input_time = 300/' /usr/local/php/etc/php.ini
ln -s /usr/local/lib/libzip.so.5 libzip.so.5
/etc/init.d/php-fpm74 restart
若报错:
Gracefully shutting down php-fpm warning, no pid file found - php-fpm is not running ?
Starting php-fpm /usr/local/php/sbin/php-fpm: error while loading shared libraries: libzip.so.5: cannot open shared object file: No such file or directory failed
#缺乏libzip.so.5
ln -s /usr/local/lib/libzip.so.5 libzip.so.5
/etc/init.d/php-fpm74 restart
执行:echo '/usr/lib' >> /etc/ld.so.conf && ldconfig
cd ~
※7、 安装zabbix_server
groupadd zabbix

useradd -g zabbix zabbix -s /sbin/nologin

wget https://cdn.zabbix.com/zabbix/sources/stable/5.0/zabbix-5.0.15.tar.gz

tar zxvf zabbix-5.0.15.tar.gz  && cd zabbix-5.0.15

#拷贝zabbix web界面代码文件

cp -a  ui/* /www/web/zabbix_front/

chown www:www -R /www/web/zabbix_front/

./configure --prefix=/usr/local/zabbix-server --enable-server --enable-agent --with-mysql --with-net-snmp --with-libcurl --with-libxml2 --with-unixodbc --enable-java

make -j 4 && make install
###############################################################
cat > /usr/local/zabbix-server/etc/zabbix_server.conf <<EOF

LogFile=/var/log/zabbix/zabbix_server.log

PidFile=/var/run/zabbix/zabbix_server.pid

DBHost=localhost

DBName=zabbix

DBUser=zabbix

DBPassword=zabbixpwd

LogSlowQueries=3000

StatsAllowedIP=127.0.0.1

DBSocket=/tmp/mysql.sock

AlertScriptsPath=/usr/lib/zabbix/alertscripts

ExternalScripts=/usr/lib/zabbix/externalscripts

StartTrappers=150

StartDiscoverers=10

Timeout=30

StartPollers=100

StartPollersUnreachable=10

CacheSize=2048M

CacheUpdateFrequency=300

HistoryCacheSize=1024M

TrendCacheSize=256M

ValueCacheSize=1024M

EOF
########################################################

ln -s /usr/local/zabbix-server/bin/* /usr/sbin/

ln -s /usr/local/zabbix-server/sbin/* /usr/sbin/

mkdir -p /var/log/zabbix && mkdir -p /var/run/zabbix

mkdir -p /usr/lib/zabbix/alertscripts  && mkdir -p /usr/lib/zabbix/externalscripts

chown zabbix:zabbix  -R /var/run/zabbix/  &&  chown zabbix:zabbix  -R /var/log/zabbix  && chown zabbix:zabbix  -R  /usr/lib/zabbix/

#导入zabbix数据库

cd ~/zabbix-5.0.15/database/mysql/

mysql -h'127.0.0.1' -u root -p"ddmddm12345" -e "create database zabbix character set utf8 collate utf8_bin;"

mysql -h'127.0.0.1' -u root -p"ddmddm12345" -e "create user zabbix@localhost identified by 'zabbixpwd';"

mysql -h'127.0.0.1' -u root -p"ddmddm12345" -e "grant all privileges on  zabbix.* to zabbix@localhost;"

mysql -h'127.0.0.1' -u root -p"ddmddm12345" -e "flush privileges;"

mysql -h'127.0.0.1' -u root -p"ddmddm12345"  zabbix <schema.sql

mysql -h'127.0.0.1' -u root -p"ddmddm12345"  zabbix <images.sql

mysql -h'127.0.0.1' -u root -p"ddmddm12345"  zabbix <data.sql

##启动zabbix_server

zabbix_server
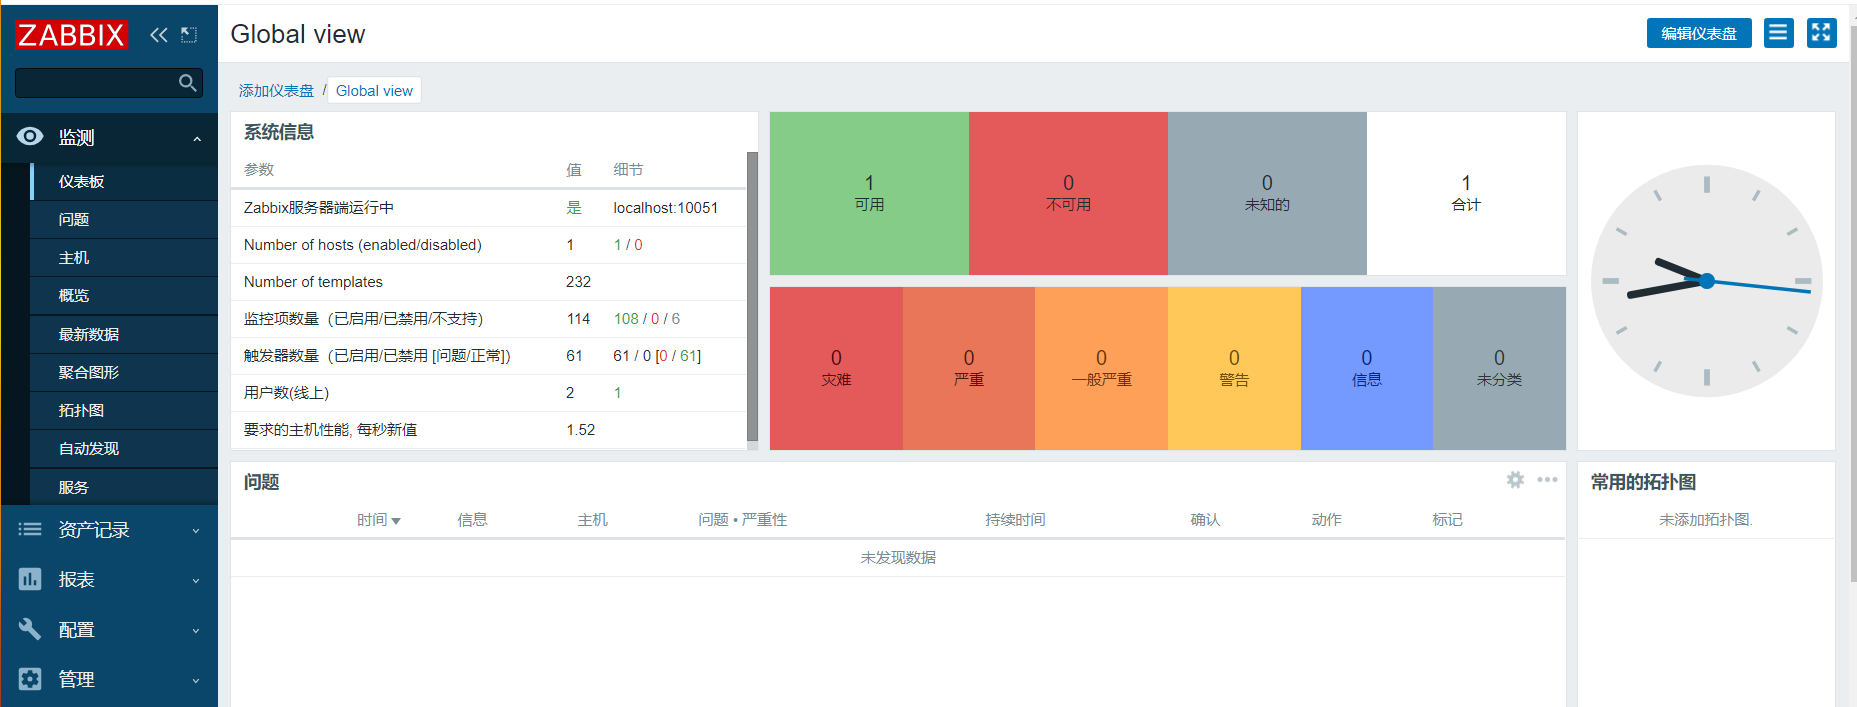
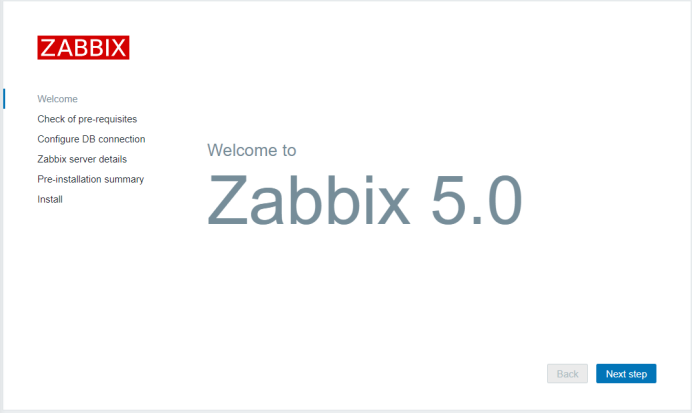
※8、 安装zabbix图形界面
浏览器打开http://IP
#检查全部为ok才可以进行下一步安装
#Database host地址设置为127.0.0.1
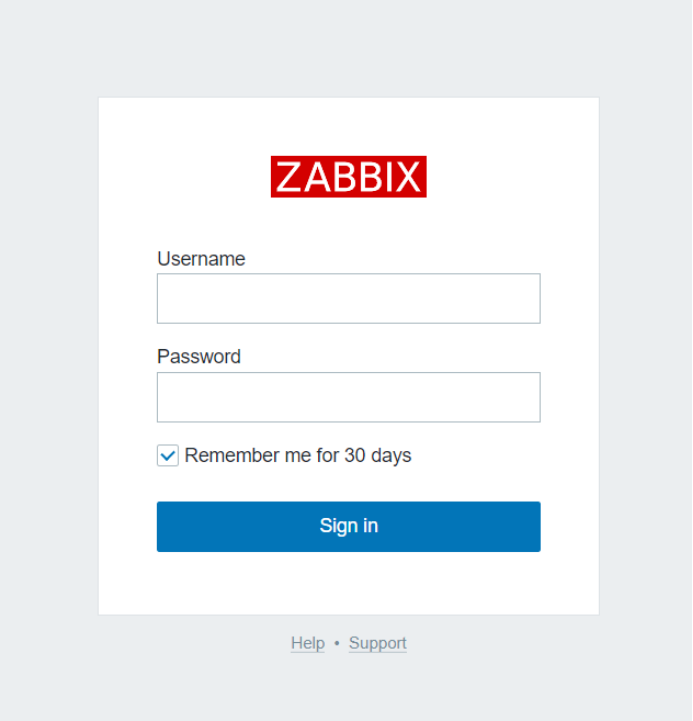
#登录zabbix 默认账号:Admin 默认密码:zabbix 登录马上修改密码
#Database host地址设置为127.0.0.1
#登录zabbix 默认账号:Admin 默认密码:zabbix 登录马上修改密码

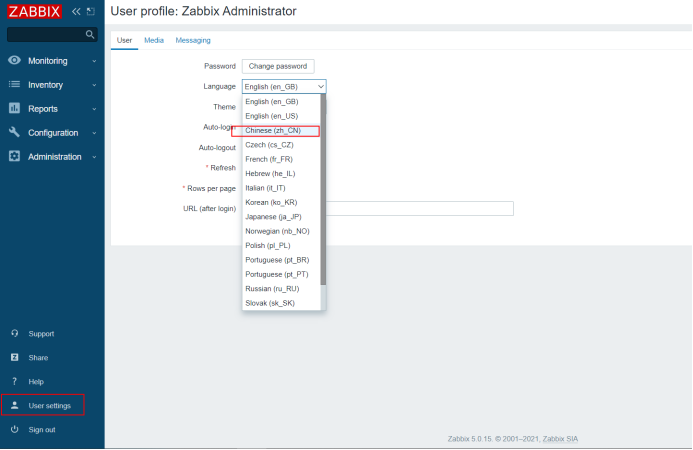
※9、 配置zabbix为中文,修复图形中文乱码问题
cd /www/web/zabbix_front/assets/fonts

#上传字体 覆盖字体文件

cp DejaVuSans.ttf /root/DejaVuSans.ttf  .
※10、 安装zabbix-agent
rpm -ivh zabbix-agent-5.0.15-1.el7.x86_64.rpm

##############################################
cat >/etc/zabbix/zabbix_agent2.conf <<EOF

PidFile=/run/zabbix/zabbix_agentd.pid

LogFile=/var/log/zabbix/zabbix_agentd.log

LogFileSize=0

Server=127.0.0.1

ServerActive=127.0.0.1

Hostname=Zabbix server

Include=/etc/zabbix/zabbix_agentd.d/*.conf

AllowRoot=1

EOF
##########################################
service zabbix-agent start
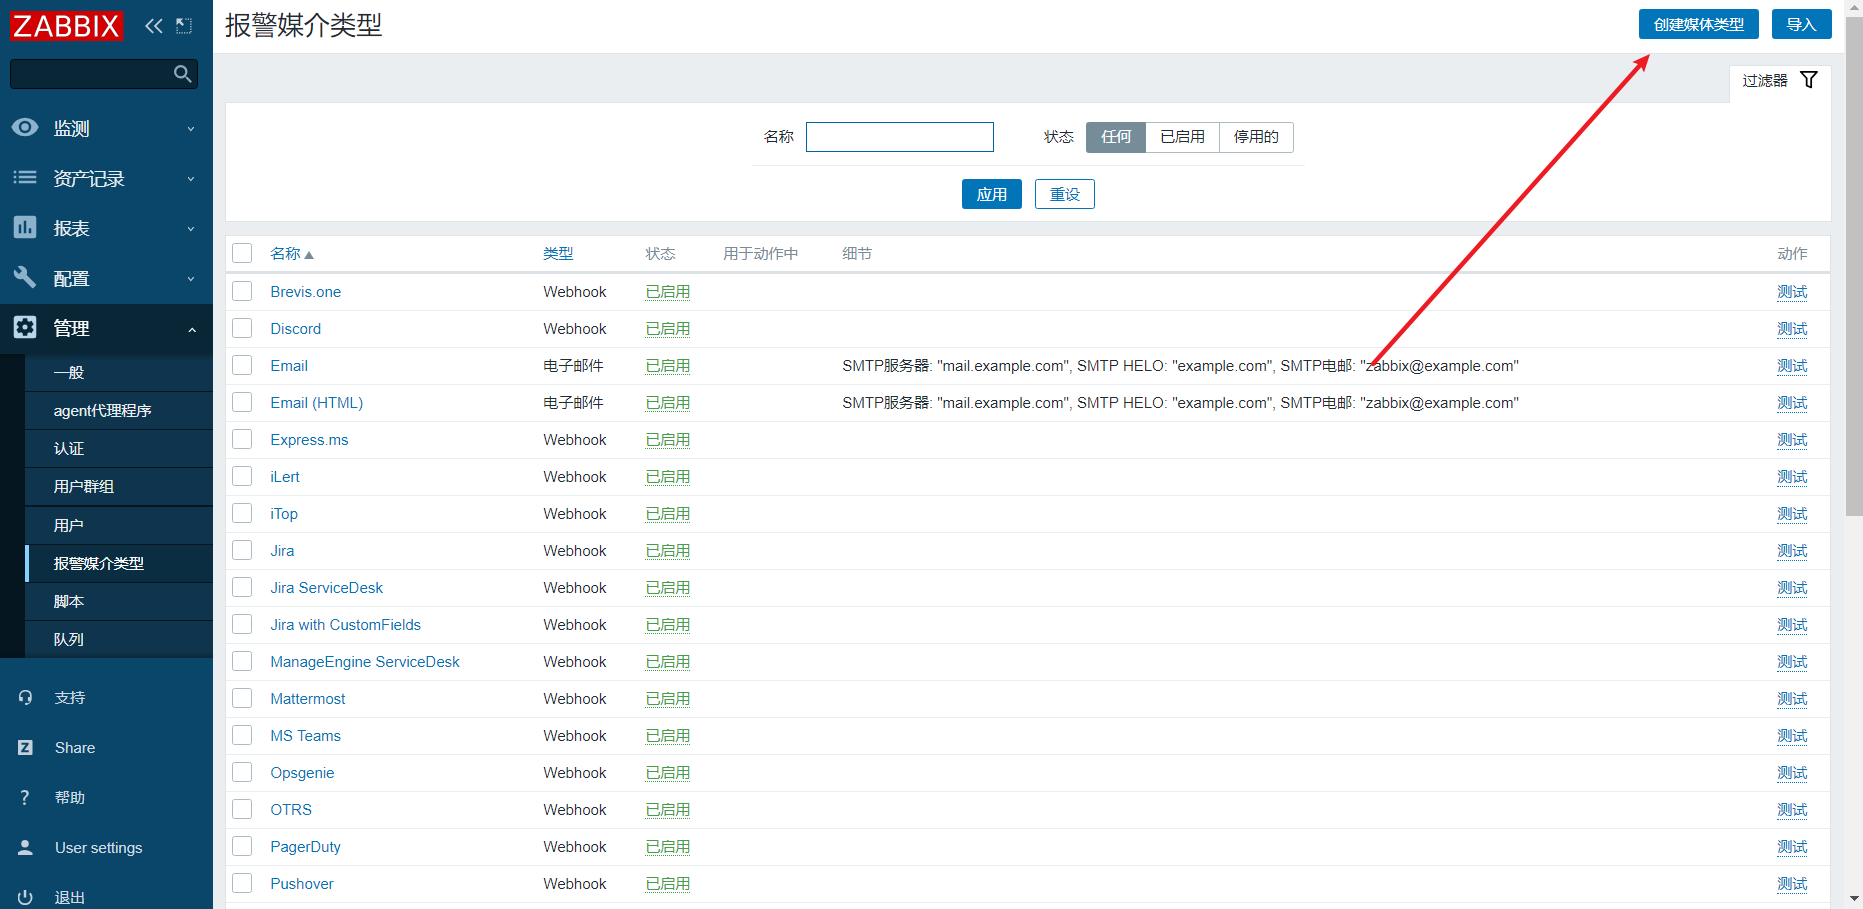
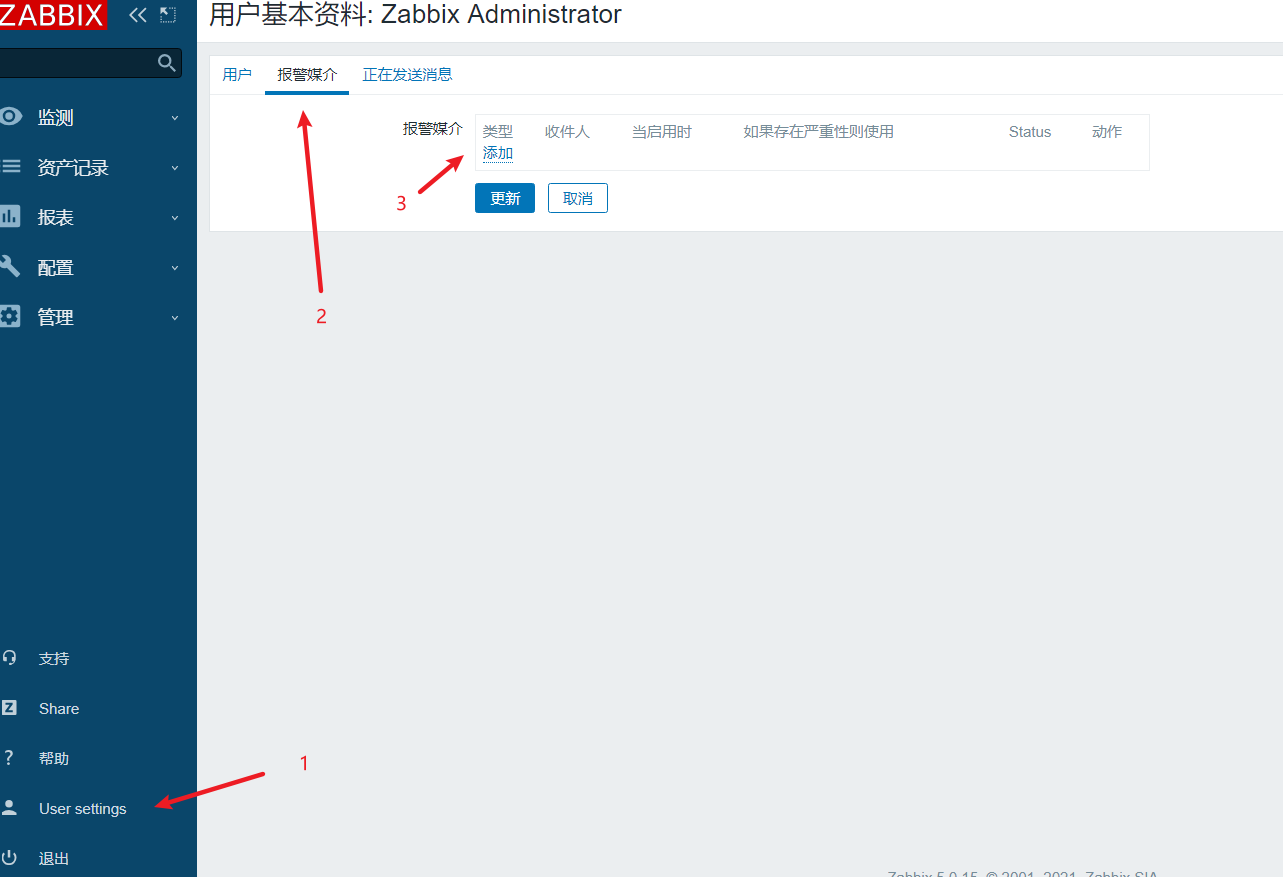
※11、 配置UG Alert 报警
A、配置报警介质类型
#配置报警媒介信息模板
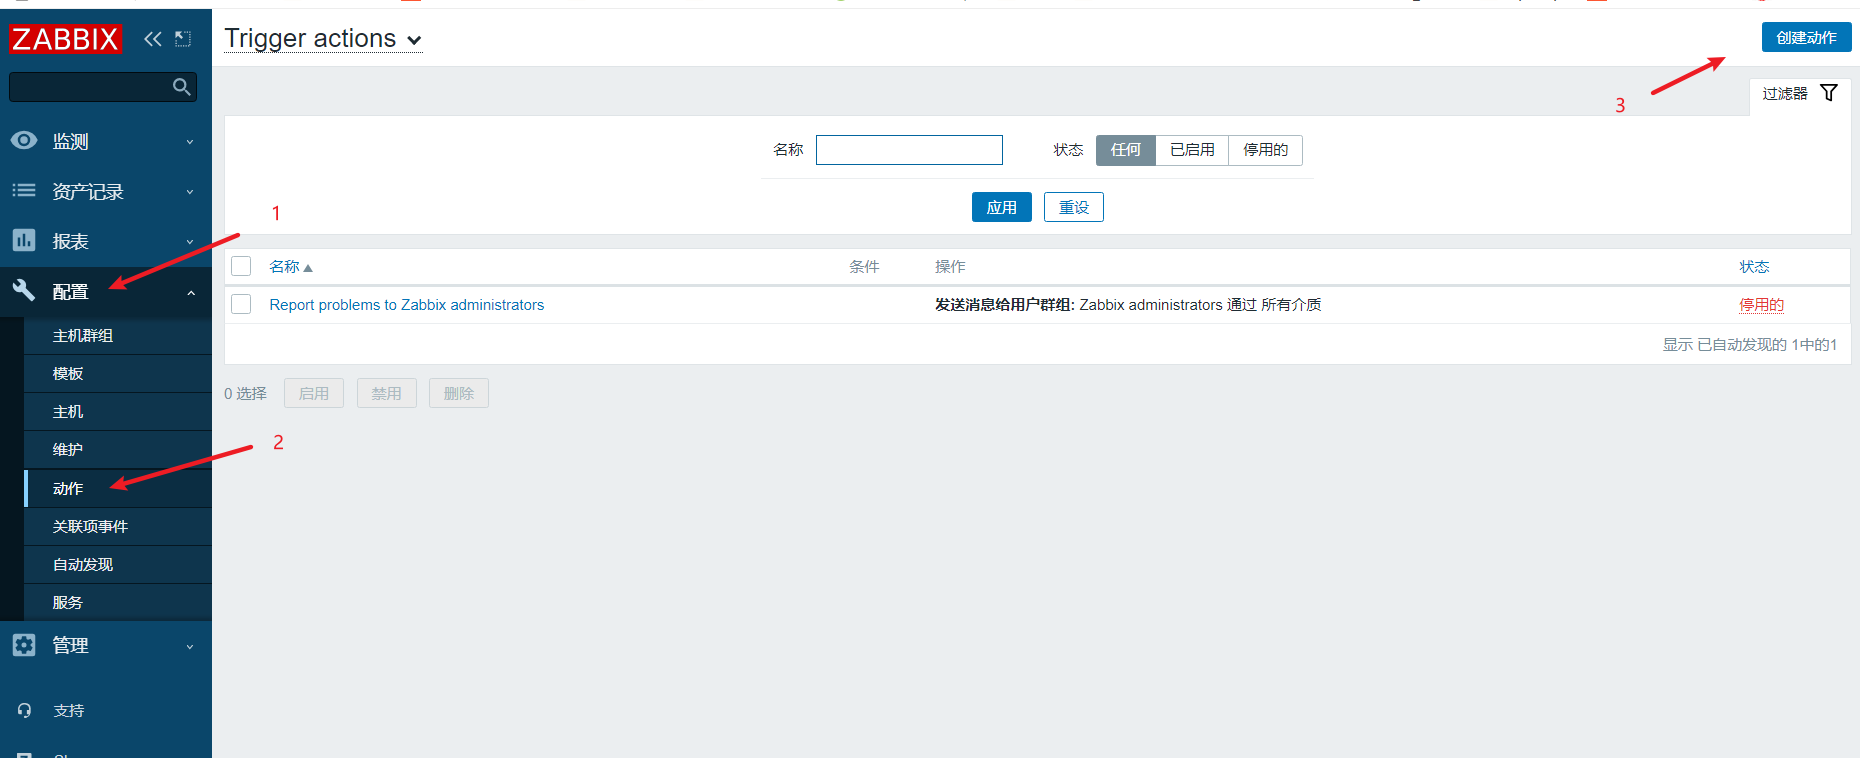
B、配置报警动作
#配置动作-操作
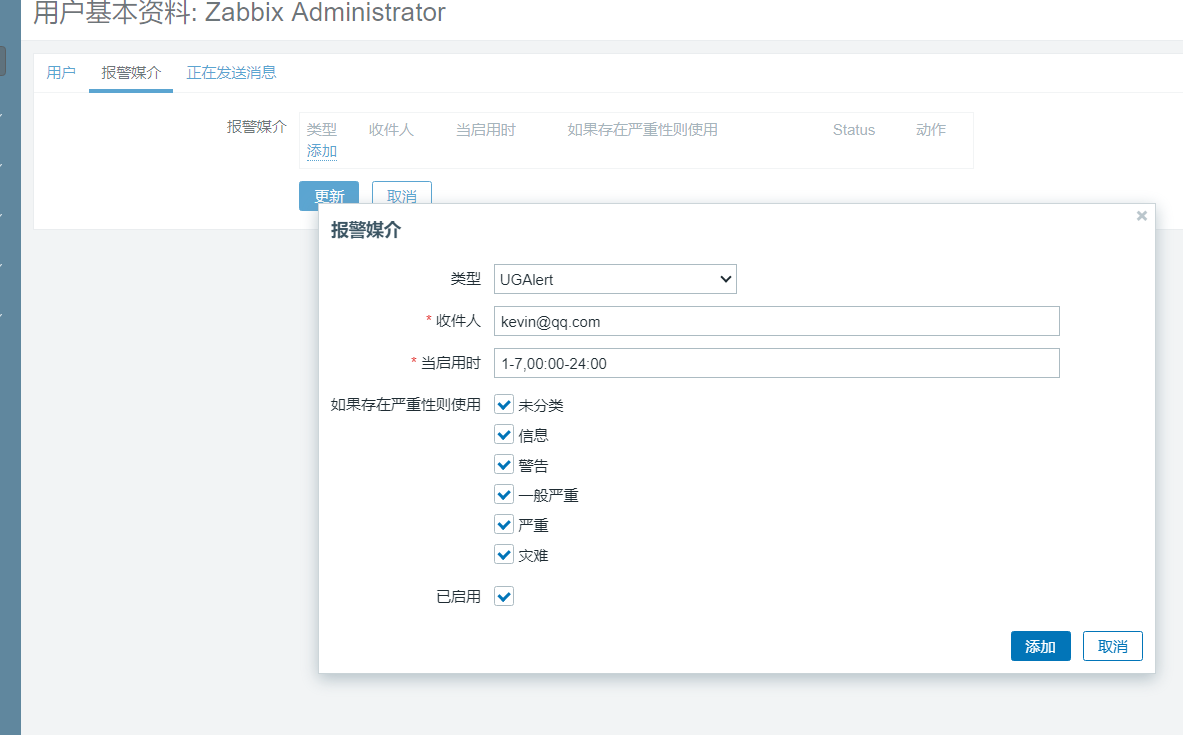
C、配置用户报警媒介
D、拷贝报警脚本到zabbix报警脚本目录
cp ugalert.sh /usr/lib/zabbix/alertscripts
#重启服务
pkill zabbix_server
zabbix_server
#配置完成
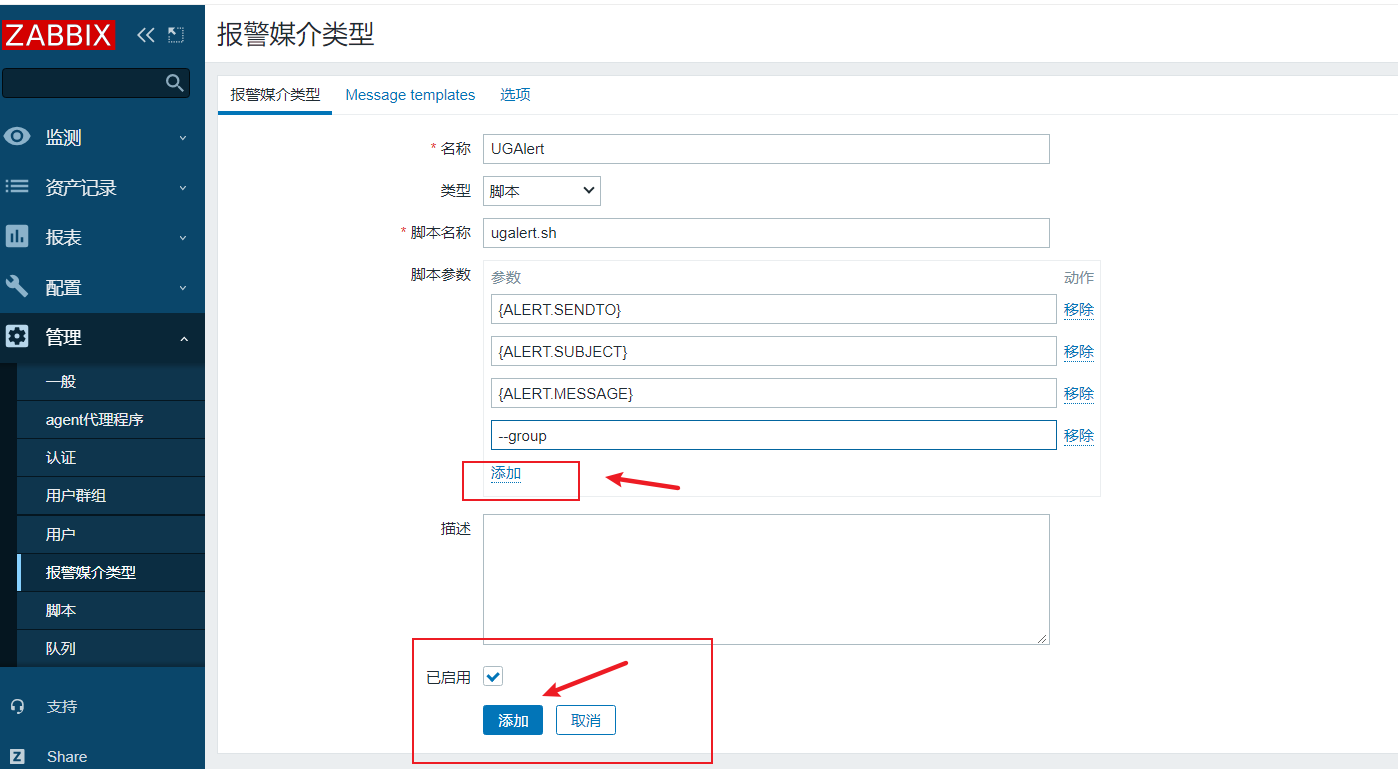
配置报警参数
#如下参数对应下图,请根据参数配置复制粘贴
名称:UGAlert
类型:脚本
脚本名称:ugalert.sh
脚本参数依次对应:
{ALERT.SENDTO}
{ALERT.SUBJECT}
{ALERT.MESSAGE}
--group
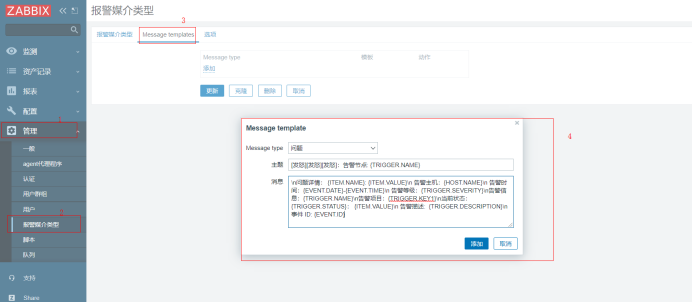
A、配置报警媒介信息模板
模板
#添加信息
问题(手动选择)
[发怒][发怒][发怒]:告警节点: {TRIGGER.NAME}
\n问题详情: {ITEM.NAME}: {ITEM.VALUE}\n 告警主机:{HOST.NAME}\n 告警时间:{EVENT.DATE}-{EVENT.TIME}\n 告警等级:{TRIGGER.SEVERITY}\n告警信息:{TRIGGER.NAME}\n告警项目:{TRIGGER.KEY1}\n当前状态: {TRIGGER.STATUS}: {ITEM.VALUE}\n 告警描述: {TRIGGER.DESCRIPTION}\n 事件 ID: {EVENT.ID}
---problem recovery
[悠闲][悠闲][悠闲]:恢复节点: {TRIGGER.NAME}
\n问题详情:{ITEM.NAME}: {ITEM.VALUE}\n告警主机:{HOST.NAME}\n告警等级:{TRIGGER.SEVERITY}\n当前状态:{TRIGGER.STATUS}:{ITEM.VALUE}\n告警描述:{TRIGGER.DESCRIPTION}a\n告警时间:{EVENT.DATE}-{EVENT.TIME}\n事件ID: {EVENT.ID}
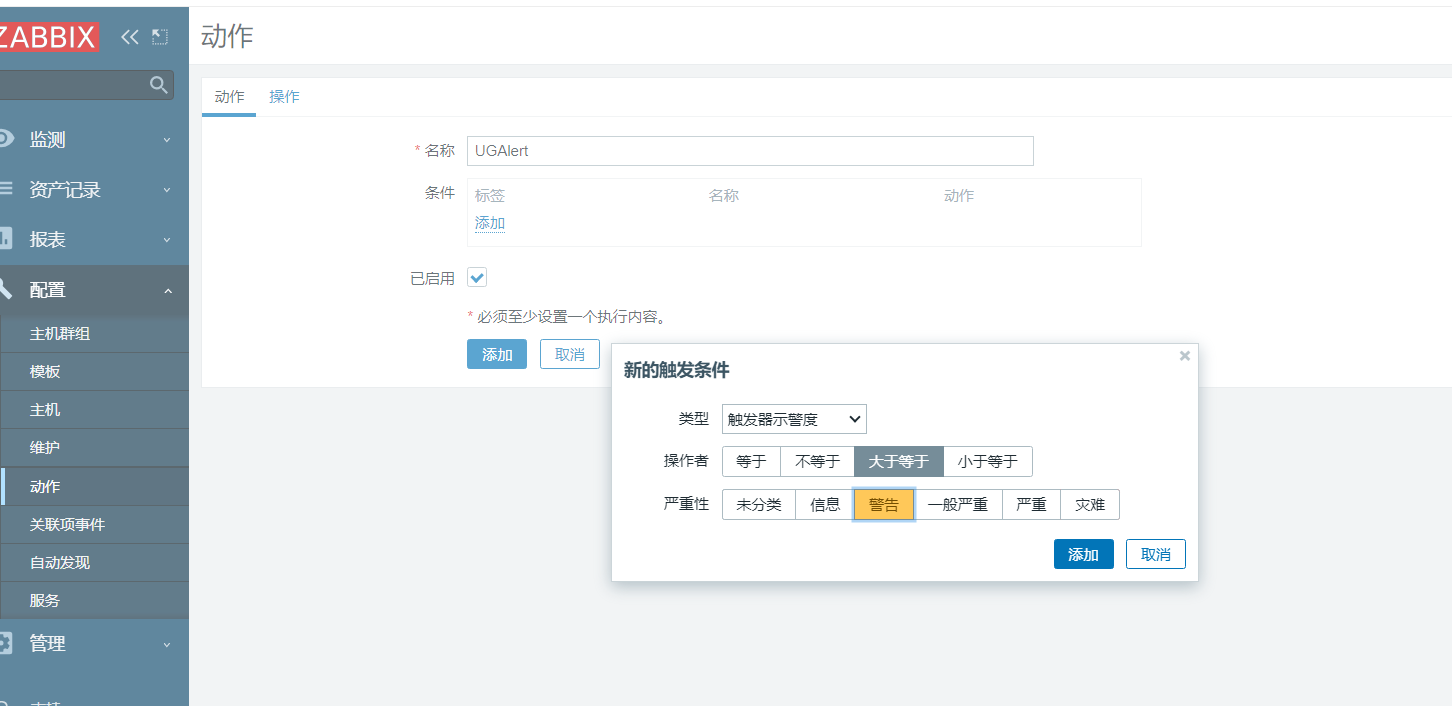
B、配置报警动作
名称:UGAlert
操作堵:大于等于
严重性:警告
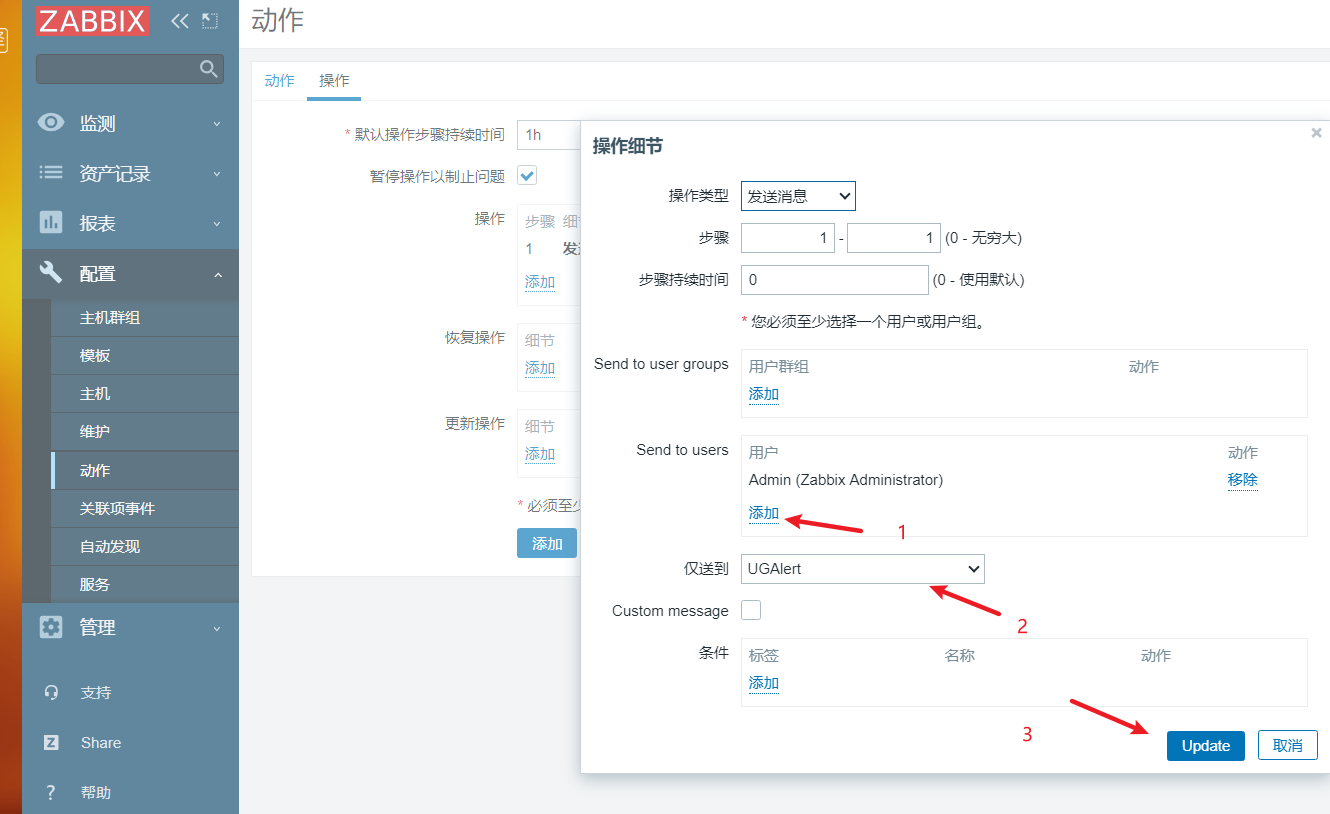
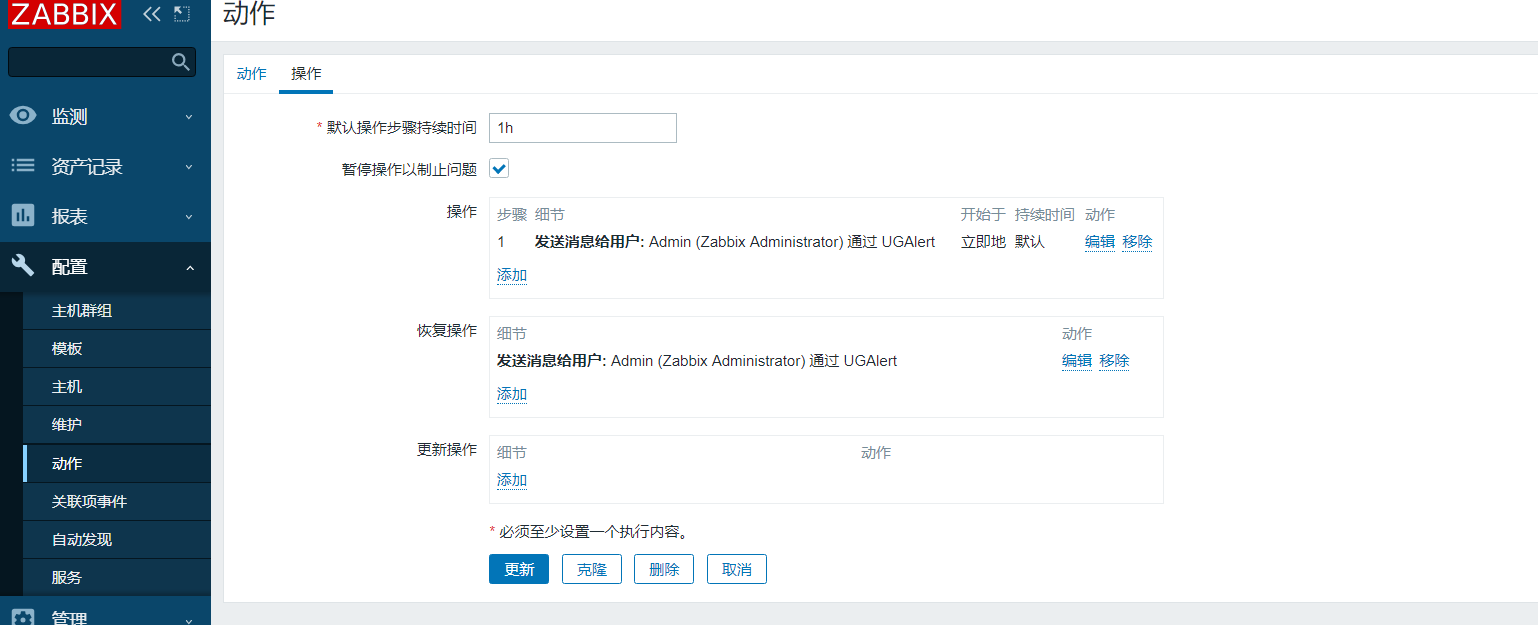
配置动作-操作
发送消息-添加admin组
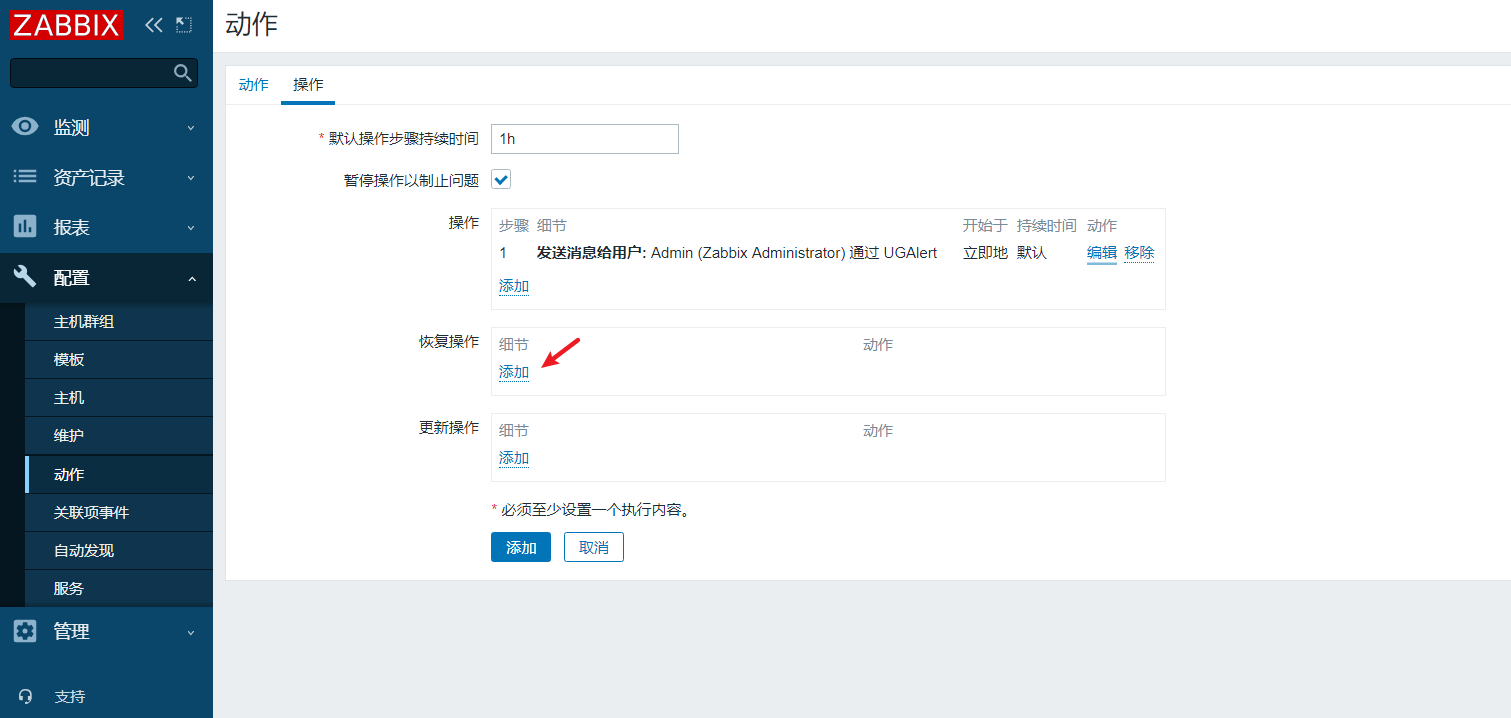
恢复消息-添加admin组
C、配置用户报警媒介
D、拷贝报警脚本到zabbix报警脚本目录
cp ugalert.sh /usr/lib/zabbix/alertscripts
#重启服务
pkill zabbix_server
zabbix_server
#配置完成